
Ensure Proper Ventilation
January 3, 2020
Fair warning
Be careful falling down the mechanical keyboard rabbit-hole because it’s a long drop. This is a story about my recent adventures down that deep, dark tunnel. If you don’t self-identify as a keyboard enthusiast you might want to skip this one. None of the companies or products I mention in this post are sponsor or affiliate links.
Introduction
Matias makes excellent mechanical keyboards. For example, take the Mini Tactile Pro for Mac.
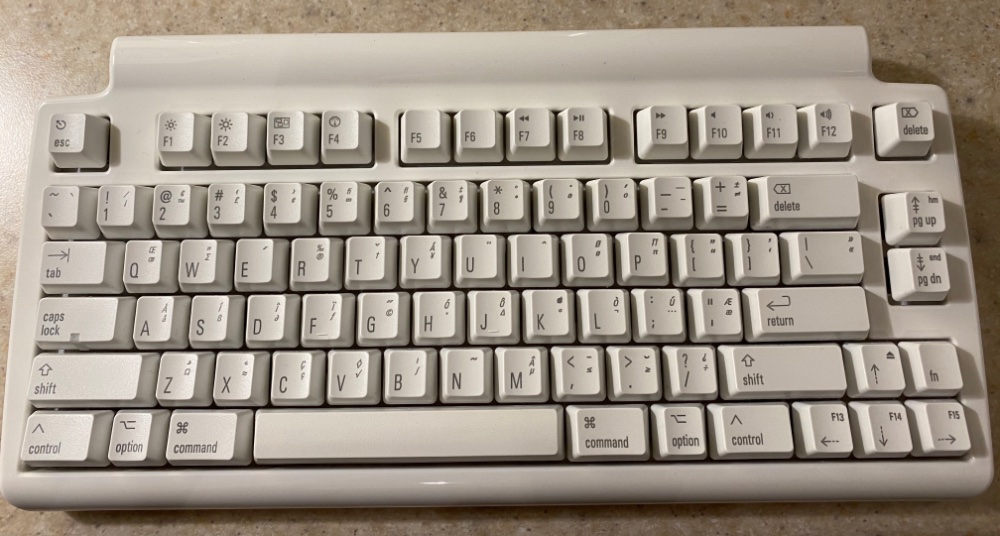
Figure 1: My daily driver
It’s a Mac keyboard (it sends Mac-specific scan codes for each key, including media and system keys) and uses the Matias Click switch: a clicky tactile switch inspired by the old ALPS white, long out of production, that many prefer over today’s gamut of Cherry MX-style switches and variants.
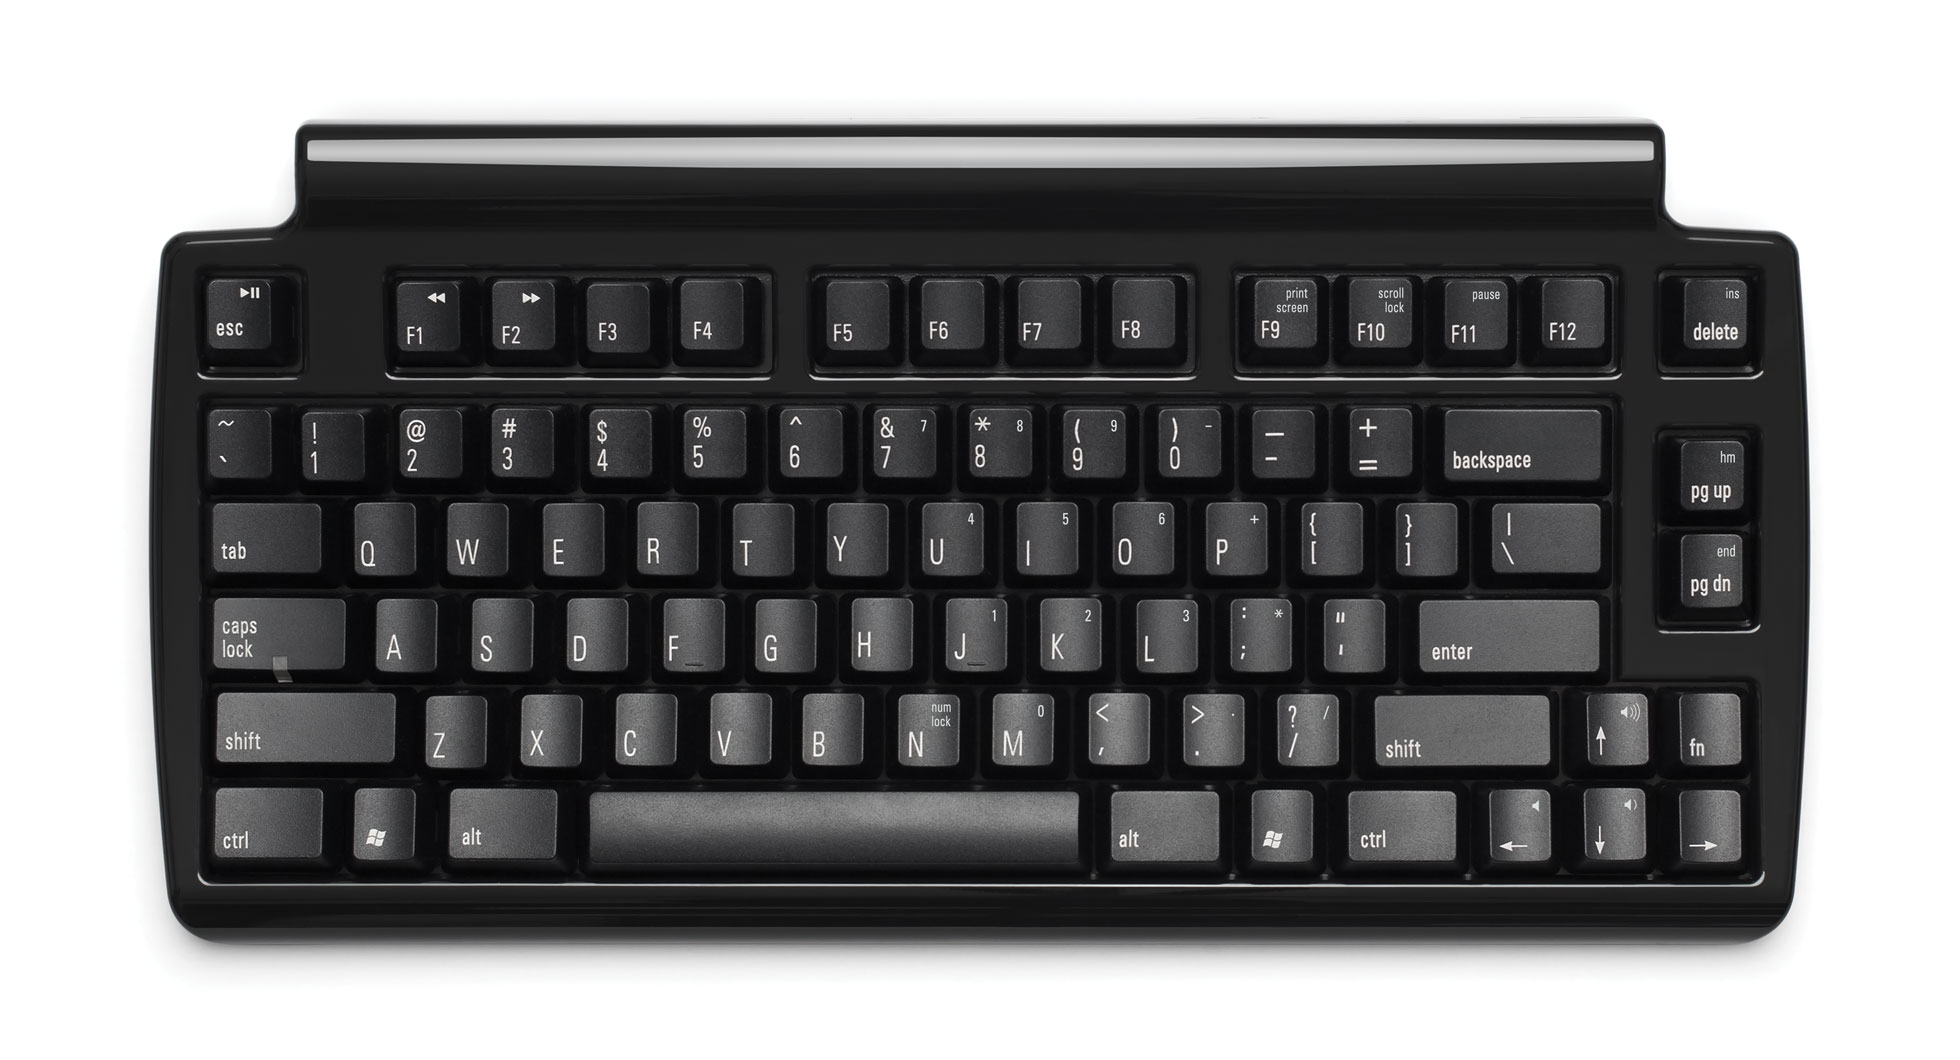
Figure 2: Matias Mini Quiet Pro for PC
This is the Mini Quiet Pro Keyboard for PC. It has a beautiful piano-black case with matching black keycaps and white legends. It’s gorgeous. Unfortunately it is only available with PC-legend keycaps (and PC-specific scan codes) and also uses a different, non-clicky switch, which sacrifices the satisfying clickiness of the Mini Tactile Pro.
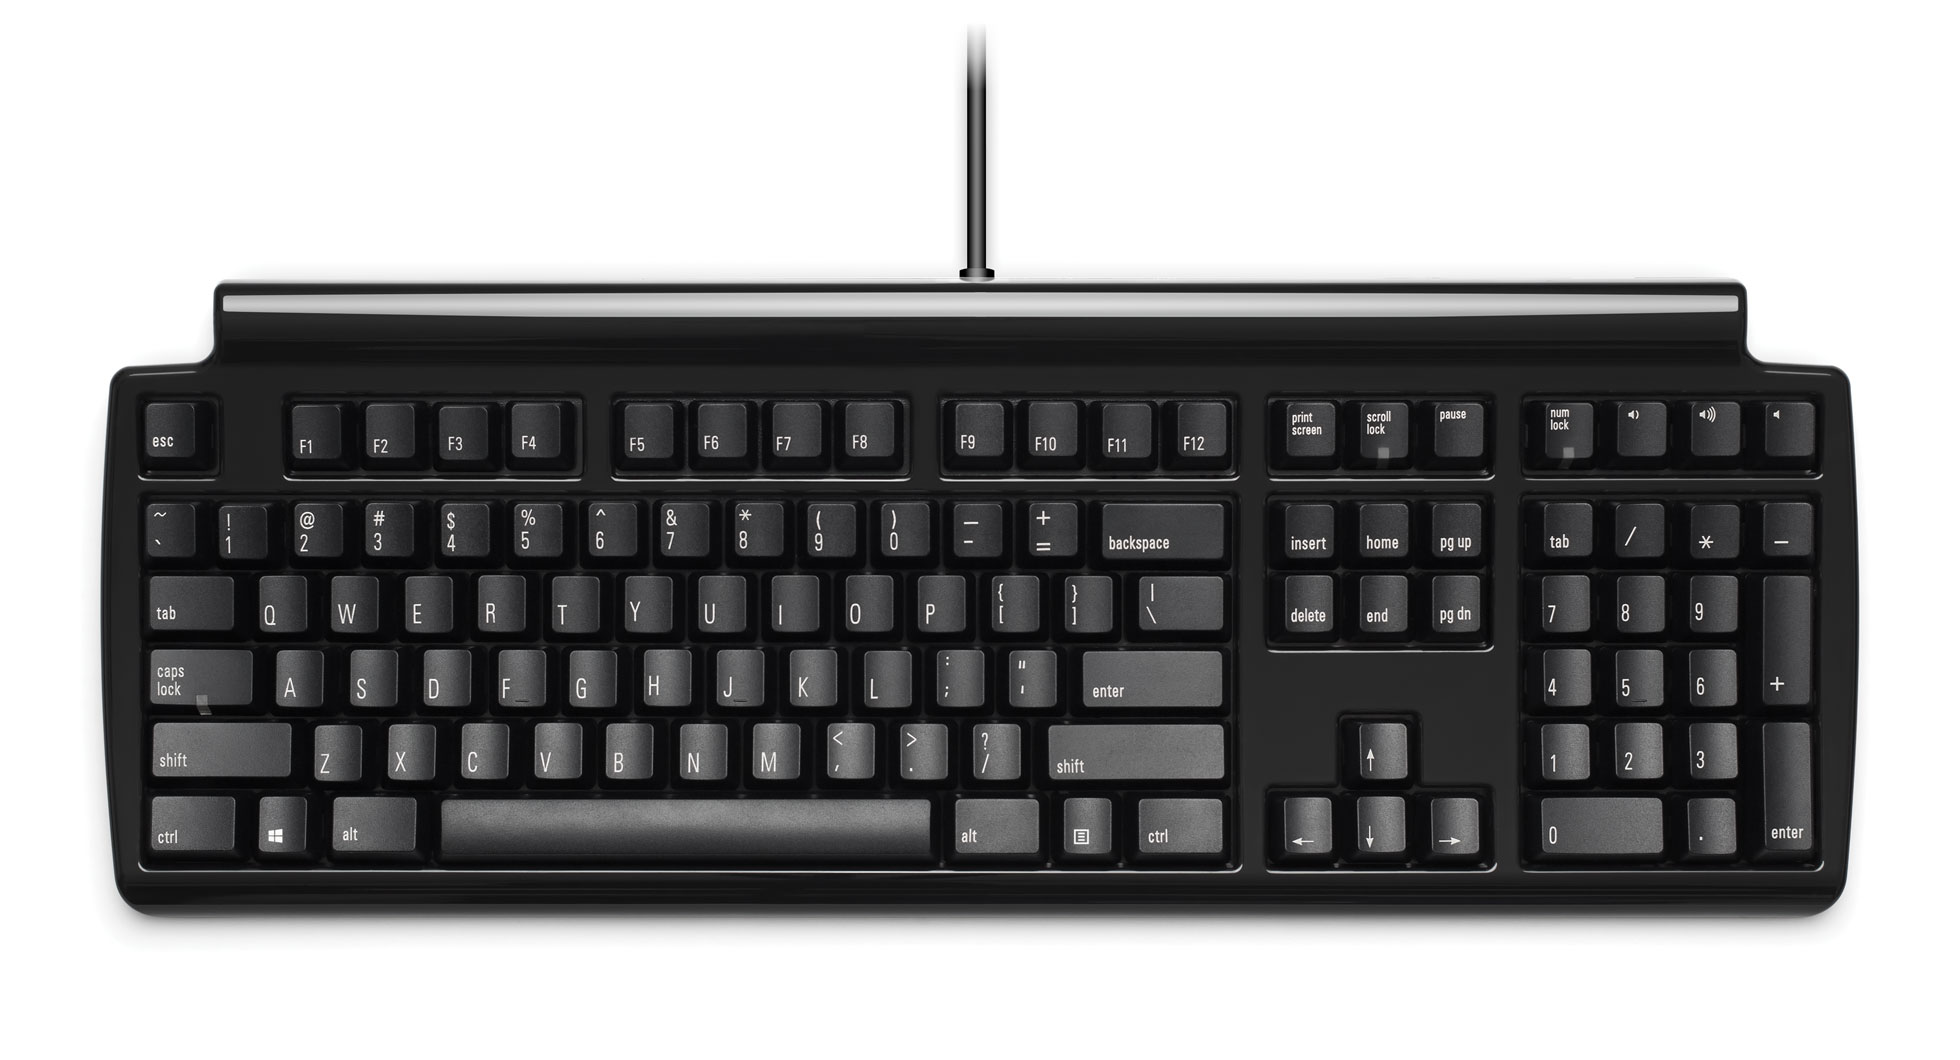
Figure 3: Matias Tactile Pro 4 for PC
This is the Tactile Pro Keyboard for PC. Matias no longer makes this keyboard but it is still available from some distributors like The Keyboard Company in the UK. It uses a slightly older version of the Matias Click switches. The feel is similar, but keypresses have a lower-frequency sound and require a bit less force to actuate. That makes them incredibly enjoyable to use, and are, to this day, my very favorite mechanical keyboard switch. This keyboard is also PC-specific and is not available in a tenkeyless variant. If you can find it at all, that is.
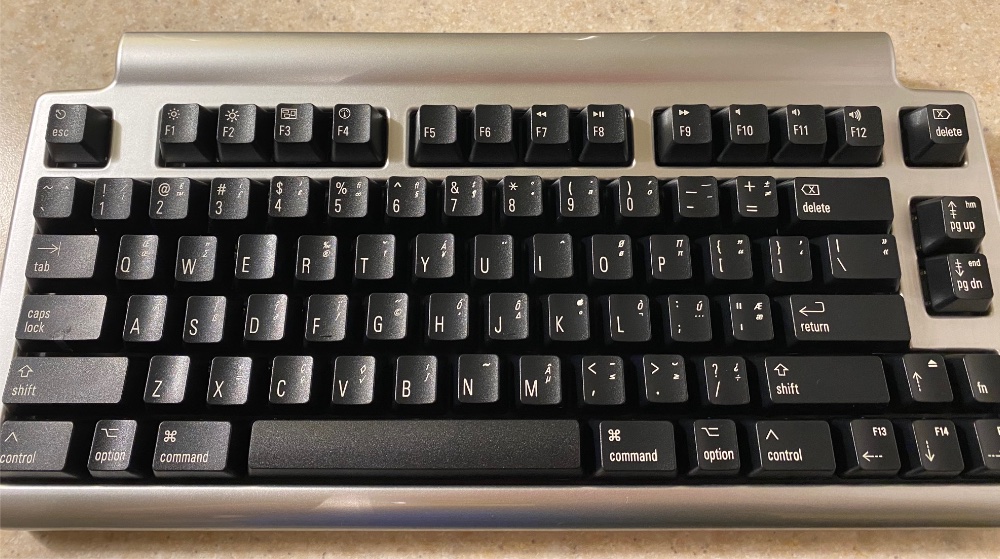
Figure 4: Matias Laptop Pro for Mac
Finally, this is the Laptop Pro for Mac. It uses the same quiet, non-clicky switches as the Mini Quiet Pro and has a somewhat bland gray case, but it has Mac-specific black keycaps and is easily available directly from Matias.
So, four keyboards, each with their distinct advantages. The Mac-specific scan codes of the Mini Tactile Pro, the beautiful black case of the Mini Quiet Pro, the just-right switches from the Tactile Pro 4, and the black Mac keycaps of the Laptop Pro. What if they could be combined into a single, perfect Black Mini Tactile Pro for Mac?
But how?
My plan was simple. I would find one keyboard of each type, take them apart, then mash them together into a single ideal specimen.
I would desolder the keyswitches from a Tactile Pro 4 for PC, solder them into the PCB of a Mini Tactile Pro for Mac, pop on the black keycaps of the Laptop Pro for Mac, plop the whole thing into the black case of the Mini Quiet Pro and I’d have the exact keyboard I wanted. Piece of cake.
The first step was the easiest: buying things. I already had a white Mini Tactile Pro for Mac that I condemned in the name of the cause. Then I bought a Mini Quiet Pro from Matias along with a set of black Mac keycaps that they obligingly sold me in the form of a used Mini Laptop Pro that had been returned to them.
I was blown away by how responsive and helpful the Matias rep was, and when I explained what I was attempting he charitably described my idea as “incredibly ambitious” rather than what my own brother said, which was “I wouldn’t even try.” The Matias rep even pointed me to The Keyboard Company as a possible source for the Tactile Pro 4 Keyboard for PC and I scooped up one of the eight they still had in stock at the time. Very lucky considering these keyboards are out of production and the Amazon and eBay listings I had seen for them looked pretty sketchy.
Next came the electronics supplies. My brother (and soon-to-be partner in this endeavor) correctly pointed out that desoldering the switches from the boards would be the trickiest part of all this, and suggested I pick up a desoldering tool, or even better, a full-on desoldering station.
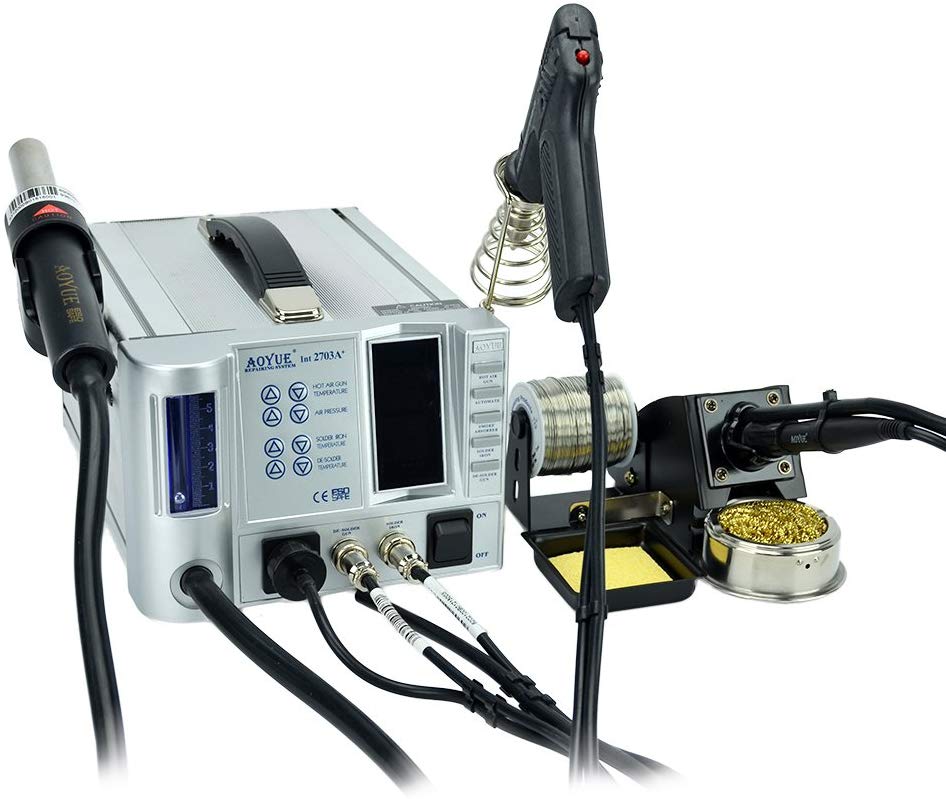
Figure 5: Aoyue Professional Repair and Rework Station
I was getting a little squeamish about the hundreds of dollars I had already committed to this project and decided to start with a much more humble $9 solder sucker.
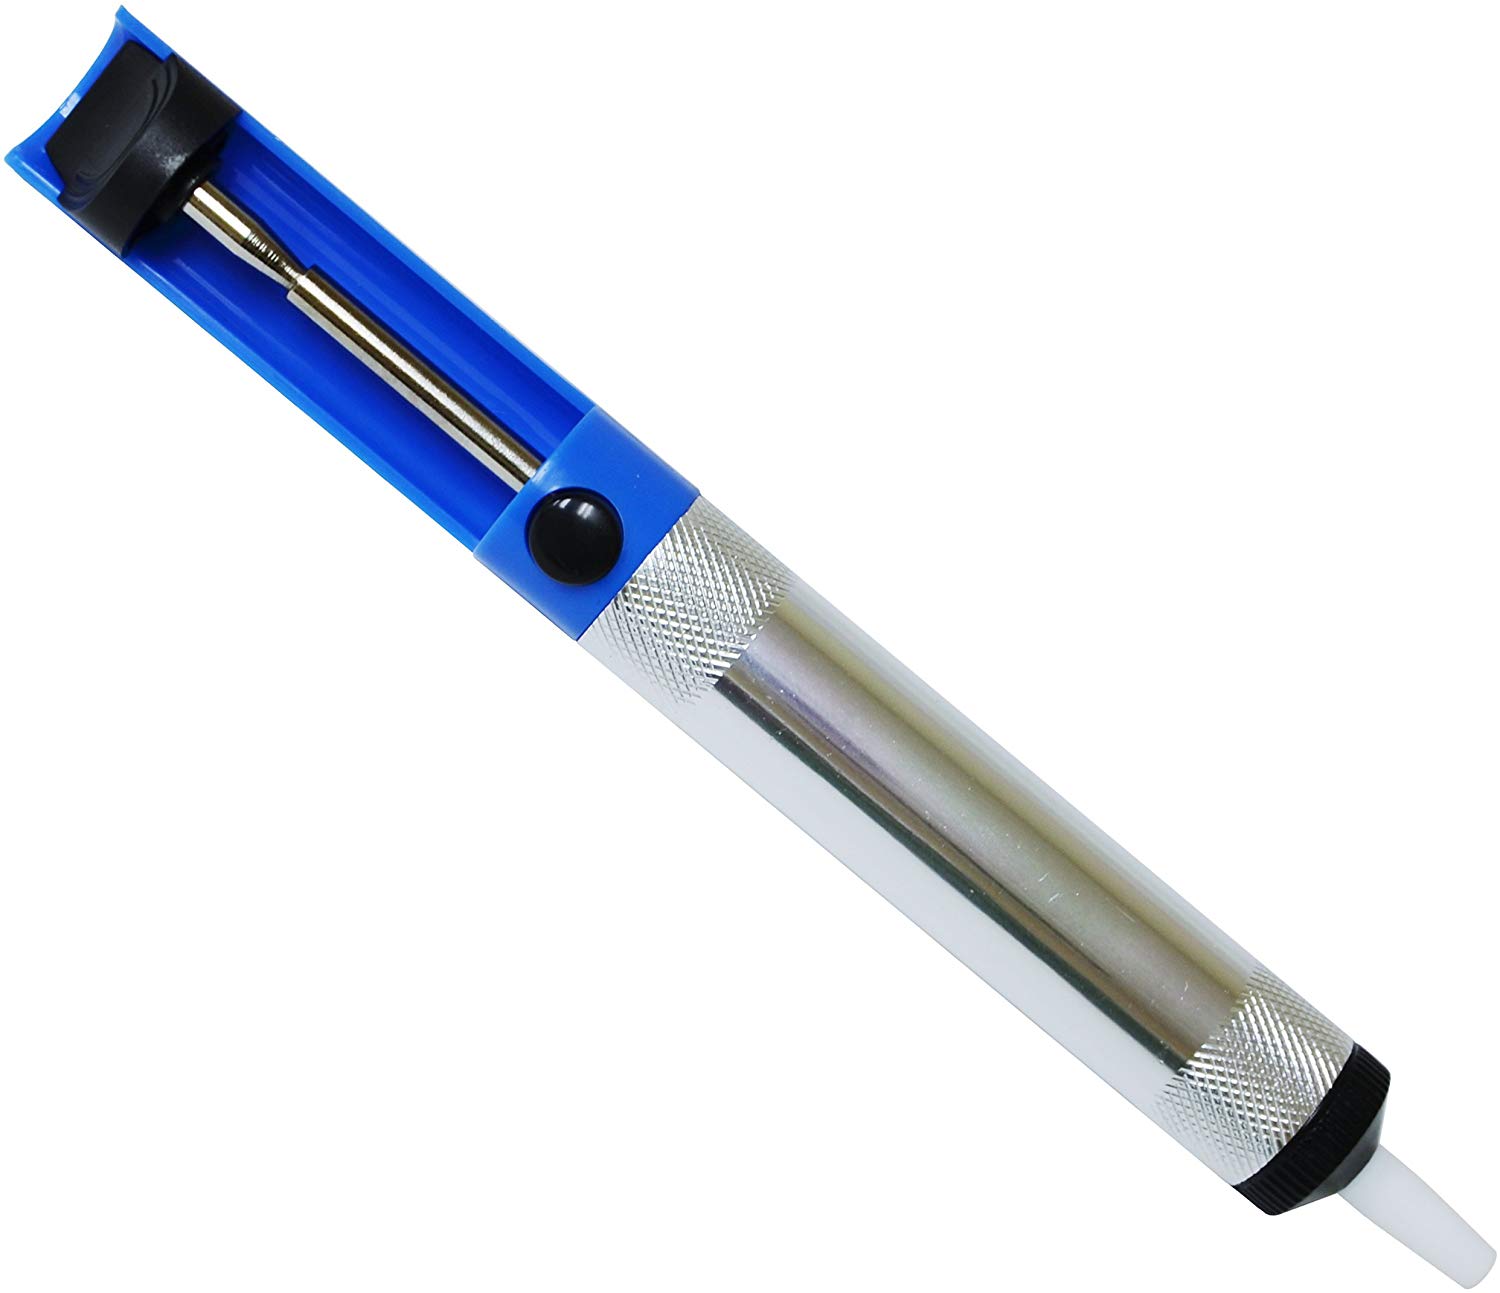
Figure 6: Wemake Solder Sucker
To that I added to some standard solder and desoldering braid and we were off to the races.
Breaking things
With a deep sigh I took apart the white Mini Tactile Pro for Mac that I had been enjoying for the past few months. I extracted the white keycaps with a keycap puller and after removing two screws from the bottom it was just a matter of carefully prying the plastic case apart.
I was relieved to see that none of the internal components were glued in. The PCB can be pulled straight out and the two side USB ports (one on each side of the top of the board) can be pulled out of their headers without any difficulty.
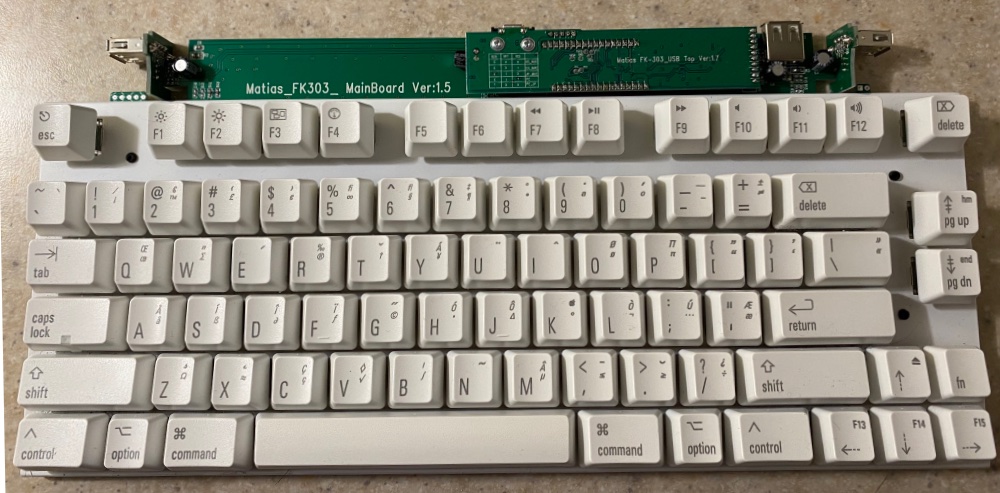
Figure 7: Open Mini Tactile Pro
This is when I hit my first setback. The baseplate of the board was white. How would that look peeking through the piano black case?
I decided instead to use the PCB of the Mini Quiet Pro (which was black) and just transplant the daughterboard from the Mini Tactile Pro for Mac… this little daughterboard is easy to remove and, evidently, provides the scan codes used by the keyboard. The white Mac Mini Tactile Pro PCB would become my desoldering practice board.
With that in mind I started trying to desolder the switches from my practice board. It looked so easy in this 3 minute video I found on YouTube.
But it was not easy. It was not easy at all. I destroyed 2 switches and pulled up some of the pads and traces on the (thankfully) practice board before I tucked my tail between my legs and called it a night.
The Trough of Despair
Anybody who does risky creative work is very familiar with the stage of so many projects which, for the purposes of this post, I’ll refer to as the Trough of Despair. The initial excitement has worn off and now there are significant challenges and the real possibility of failure. And lack of confidence or clarity about what to do next.
This is not pleasant.
I was a few hundred dollars into this now, and had just destroyed my favorite keyboard on switch number two of the 81 I would have to perfectly desolder from the destination board (the Mini Quiet Pro). Plus another 81 switches from the donor board (the Tactile Pro 4 for PC). I wasn’t sure what to do next.
The Rescue
Remember my “I wouldn’t even try” brother? Early in his career he was an electronics test technician and he knew his way around a soldering iron. After a few other choice quotes estimating the probability of eventually ending up with a working board, he took me under his wing and taught me how to properly desolder a switch.
The actual technique wasn’t too different from the YouTube video, but in practice it all comes down to experience and timing. You need to heat the solder for long enough that it doesn’t just get visibly gooey on the surface, but a second or two longer so that all the solder down through the hole melts as well. You need to nail the angle at which you hold the solder sucker: straight down doesn’t work because you don’t get enough of a seal over the pin, but you can still get good suction at a pretty acute angle provided you position the tip close enough to the pin. That kind of stuff.
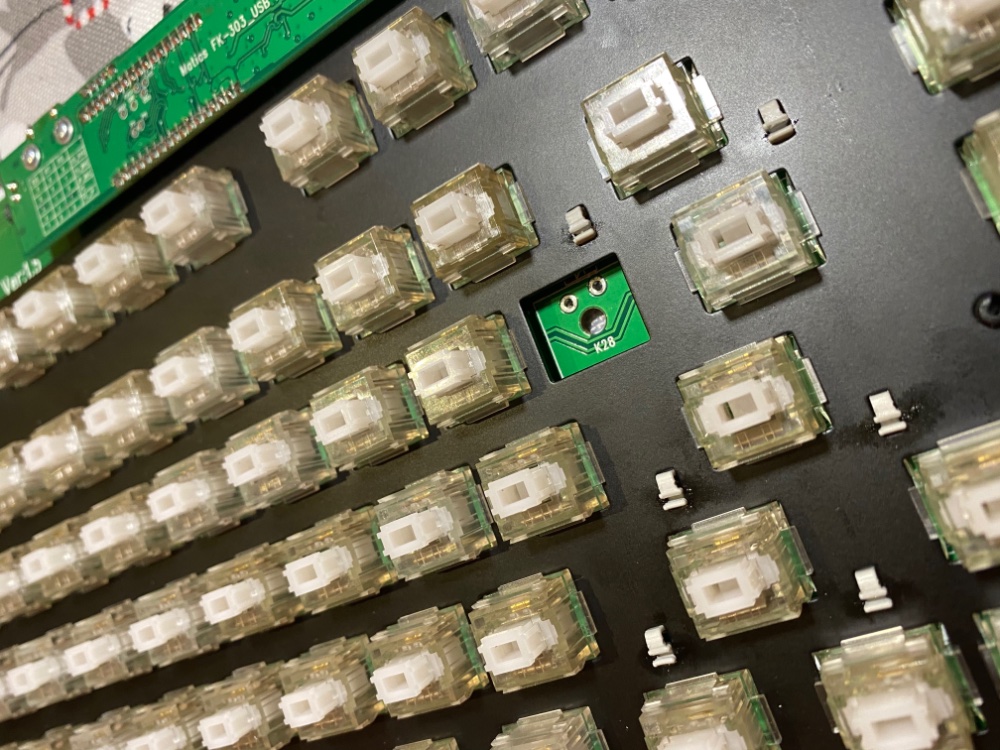
Figure 8: First switch removed
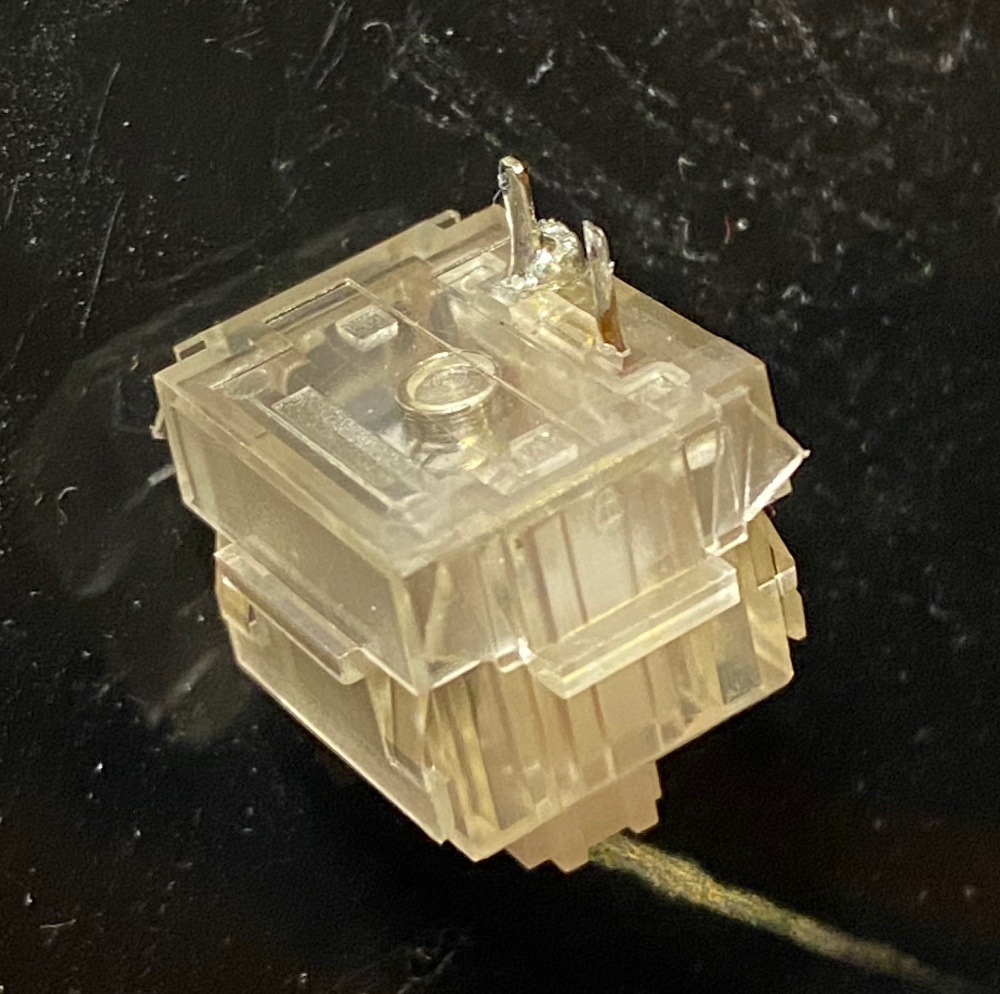
Figure 9: A desoldered switch
We did two rows of switches together, and although it was slow going (requiring us to, for example, re-solder some partially sucked-out pins so that we could try again) I eventually gained enough confidence to move on to the real destination board.
The Slog
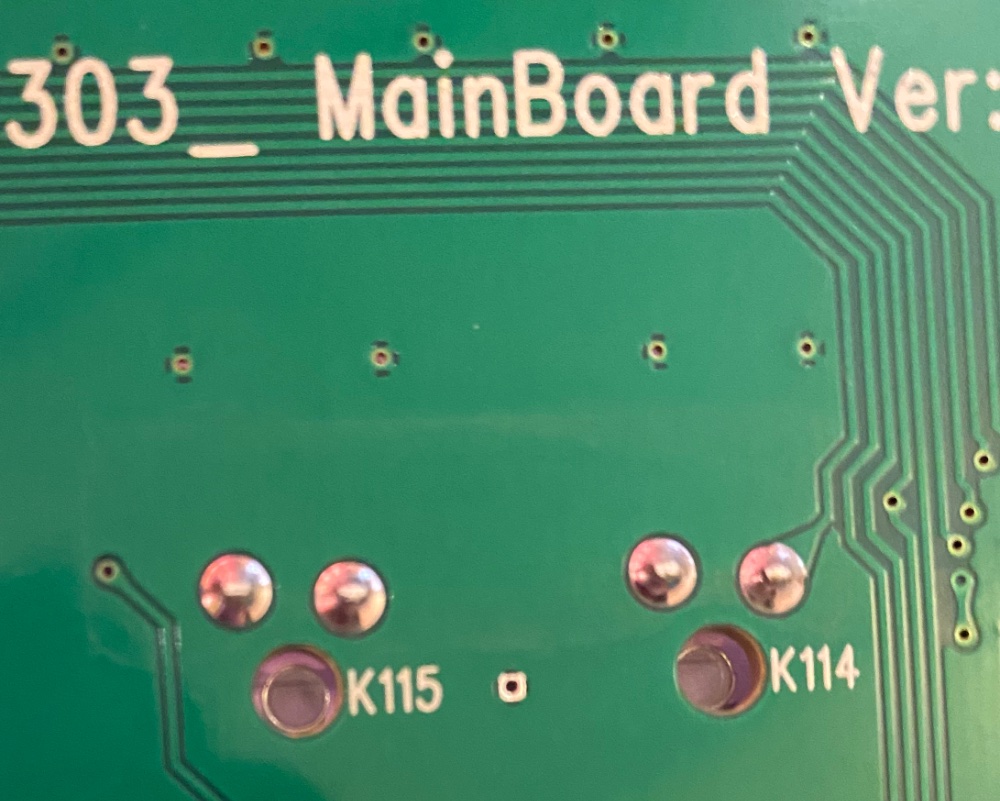
Figure 10: Soldered pins
Each of the 81 keyswitches on the destination board is held on by two pins soldered to pads on the surface. Only when both pins are almost completely clear of solder can you push the switch out. Force the switch and you run the risk of detaching a pad or some of the traces from the pad to the rest of the board. A single mistake (pushing out a pad or pulling out a trace) would likely destroy the board and bring the project to an abrupt end.
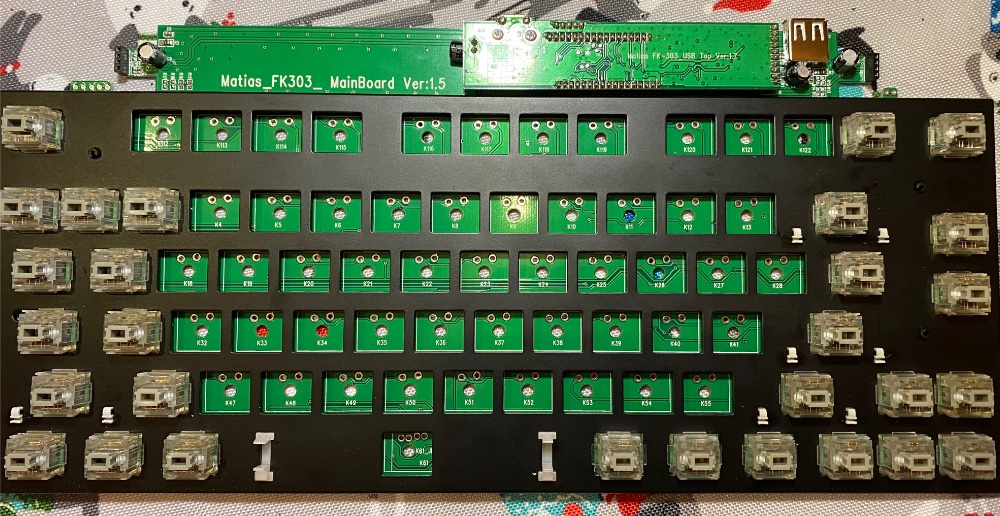
Figure 11: Partially desoldered destination board
I did my best to be careful and the going was slow. Every switch seemed to require special attention. Desolder, nope, re-solder, try desoldering again, a bit of solder left, try the desoldering wick, and so on.
It took me an average of 5 minutes per switch but, as far as I could tell, the board was clean and there was no evidence that I had broken it. That night I fell into bed exhausted but relieved. I had made it over the Trough of Despair.
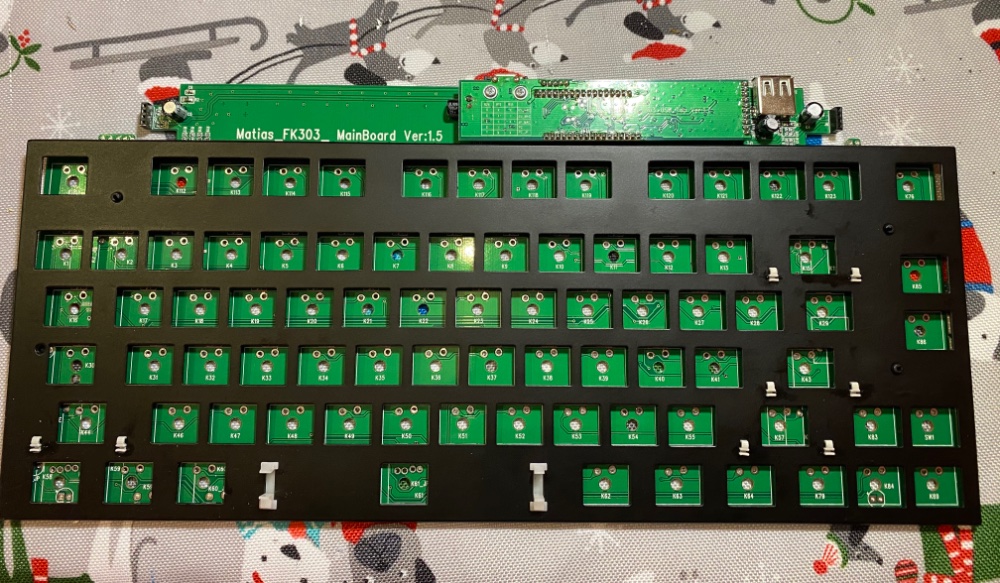
Figure 12: Clean destination board
The Pressure
My family was out of town for a few days and, in service to the project, I had turned our small living room into a makeshift electronics workshop. I had two days left to finish up before they were due back and if there were still bits of keyboards, switches, and lead solder all over the place my set of problems would broaden considerably.
I needed to get this done, and, for the donor board, I now had at least 81 more switches to desolder, or 100+ if I wanted to desolder the whole board and pick up some spare switches just in case. That would take almost 10 hours of straight grind and I was not looking forward to it. Nevertheless, I took a deep breath and got down to business.
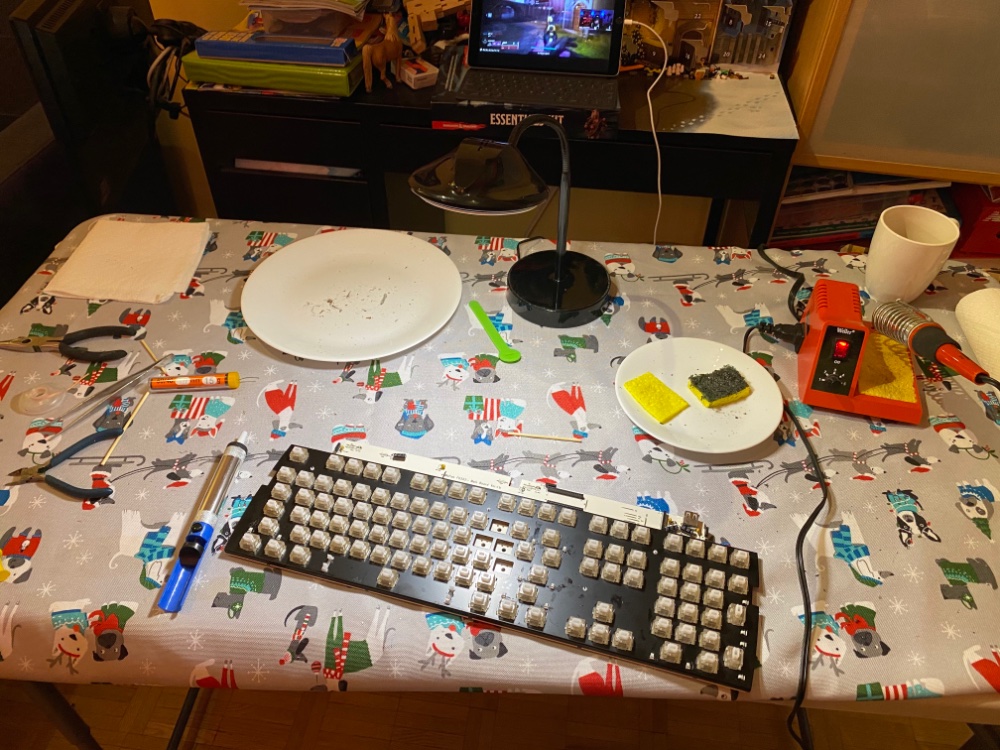
Figure 13: Our living room table
The Miracle
Whether it was the practice, the deadline pressure, a good night of sleep, or just luck, desoldering the switches on the donor board went much, much faster. I got into a nice groove and almost every switch cooperatively popped right out after a quick solder sucking.
I motored through the whole board saving almost every switch (a couple were lost due to bent or broken pins) and I was drinking a celebratory beer well before bedtime. I now had a clean destination board and all the switches I needed from the donor board. And as far as I could tell, I hadn’t broken anything I needed yet.
The Stretch
The final day of the project went quickly and smoothly. I started soldering the switches from the Tactile Pro 4 for PC onto the Mini Quiet Pro for PC PCB and, after two straight days of gruelling desoldering practice, actually soldering the switches onto the board was laughably easy.
At least until I realized the board standoffs were positioned incorrectly and I had to redo about a dozen switches, but after I stopped crying I started laughing again.
My brother dropped by and helped reach the finish line by soldering some switches as well. We finished up with the switches, re-attached the USB headers (which I had pulled out to keep them out of the way), and plugged in the daughterboard from the Mini Tactile Pro for Mac.
I carefully pushed the keycaps from the Laptop Pro into their correct positions while my brother made fun of me for taking so long. I reassembled the board into the piano black case from the Mini Quiet Pro and plugged it into my Mac.
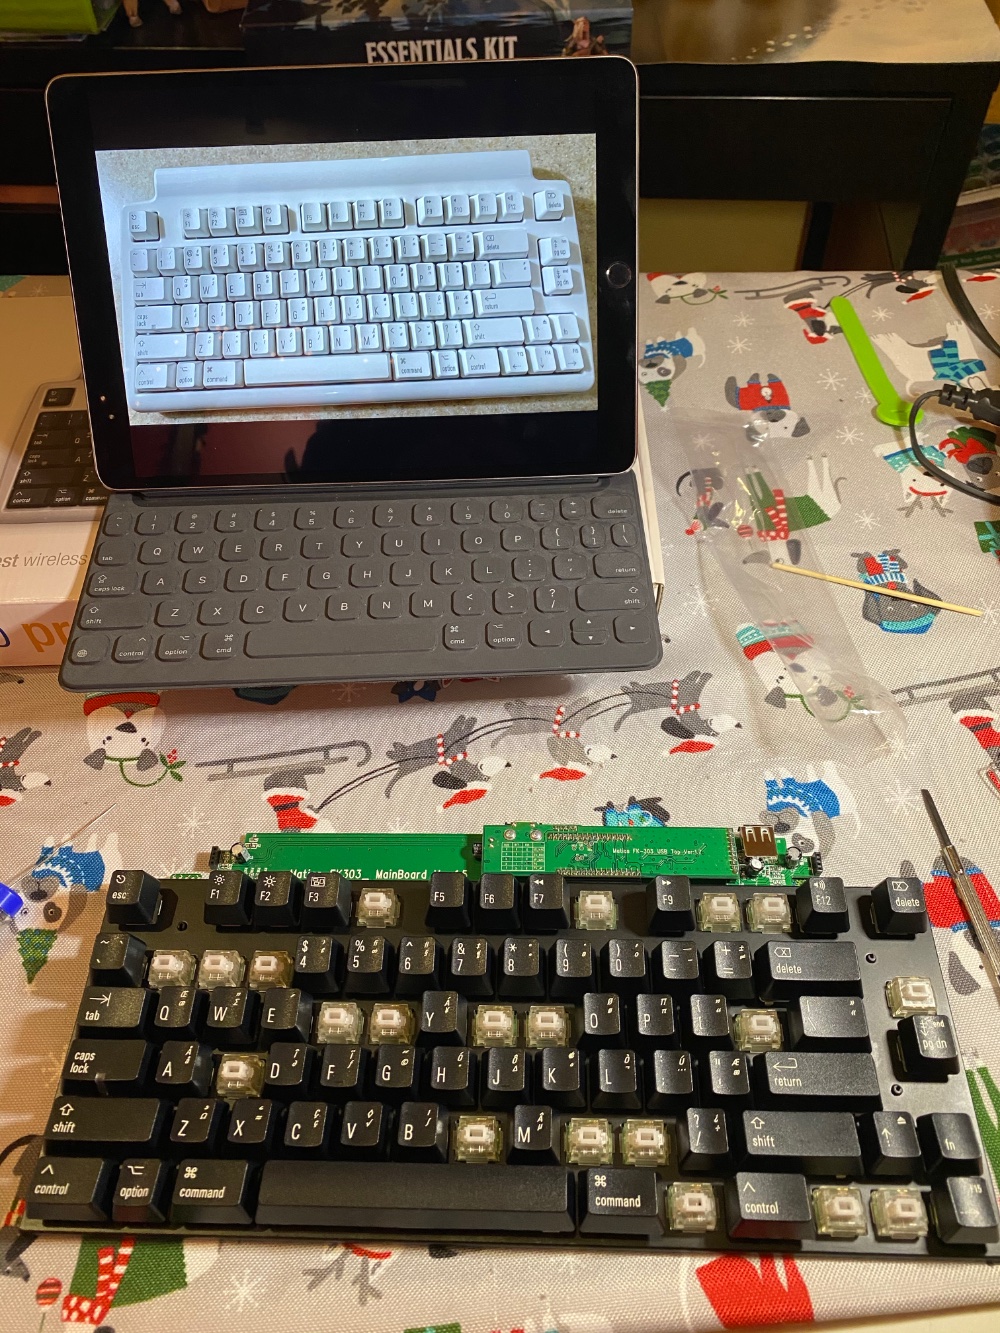
Figure 14: Pushing in the keycaps
Well, I plugged it into a USB hub which I plugged into my Mac, because I’m not ready to replace my computer just yet.
I then used the Show Keyboard Viewer menubar option provided by the macOS Keyboard System Preference pane to test each and every key. I held my breath.
The Result
Total success. Absolute victory.
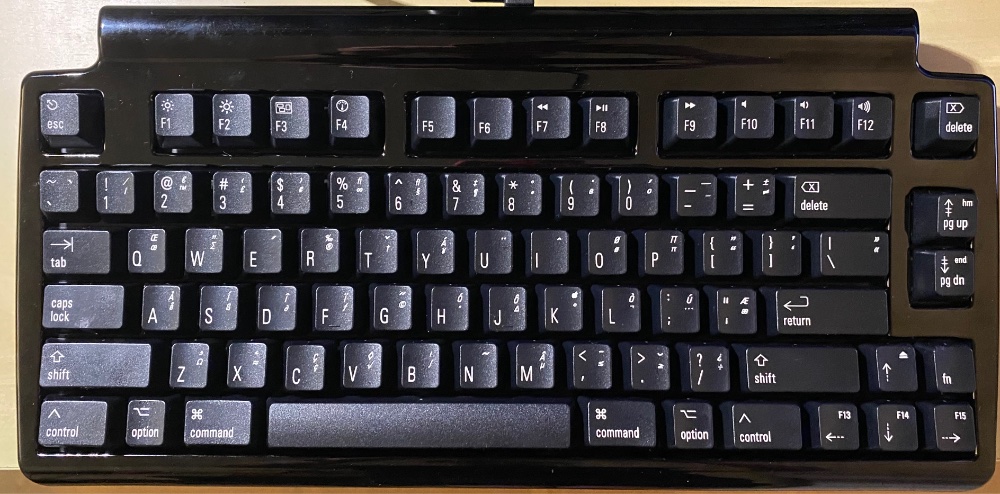
Figure 15: Matias Black Mini Tactile Pro for Mac
Thanks to a healthy dose of luck on my part and skill and experience on my brother’s, as well as the moral support of Steve from Matias (thanks Steve!) I’m typing this post on the world’s only Matias Black Mini Tactile Pro for Mac (with Tactile Pro 4 Matias Click switches). The keyboard feels and sounds amazing and, as a bonus, I have enough spare parts to keep it in service for a good long while.
I understood from the beginning that things might not have worked out and I’d be left sitting in a big pile of electronics waste. I think I would still have been glad to step out of my regular software-mostly comfort zone and given this a shot. And happily, it all seems to have worked. On my desk sits a clicky black trophy of achievement as proof.
