Automatic switch for the macOS firewall
December 20, 2020
UPDATED 2024-11-04 for macOS Sonoma: added extra note about System Settings not immediately reflecting firewall state changes, and the new requirement to put the script into /var/root. Tweaked the LaunchDaemon plist a little bit to reflect my current configuration.
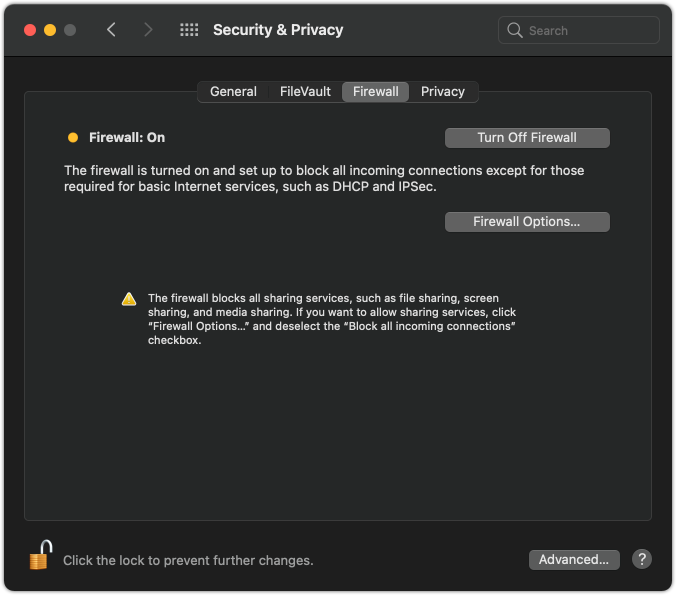
First, please don’t take this post as concrete security advice. Everyone’s situation, risk profile, and risk tolerance is different. But if you’re like me, you may not have your macOS firewall turned on right now. I’m not going to judge, especially if you’re on a trusted network behind a well configured router. You can check by going to System Preferences > Security & Privacy > Firewall.
I will suggest though that when you leave your cozy home or office network, turning on that firewall is a good idea, especially if you have anything switched on in the Sharing panel.

Figure 1: Firewall: On
Consistently remembering to do that is a chore so you may choose to leave the firewall on permanently. I don’t, because when I’m at my home office I want the Mac fully accessible from other devices on my network, and when I’m away I want things locked down as tight as I can get them.
Here’s how I have my macOS firewall switch off automatically when I’m on my home network and switch back on whenever I leave.
Find the MAC address of your home router
While connected to your home network, open Terminal and type:
system_profiler SPNetworkDataType | grep IPv4\.Router
You’ll see something that starts with:
Network Signature: IPv4.Router=192.168.0.1; ...
That 4-number IP address is probably the internal (to your network) address of your router. You might see the MAC (IPv4.RouterHardwareAddress) of your router on the same line, but let’s confirm it. Substitute the IP address from above when you type:
arp 192.168.0.1 | head -n 1 | awk '{print $4}'
You should see 6 hex numbers separated by a colon. This is your router’s MAC address and you’ll use it in the script below.
Create a networkchanged script
Create the following script and place it in /var/root/networkchanged. As of macOS Sonoma the LaunchDaemon will no longer be able to run this script if it resides in your home folder. Substitute in your router’s MAC address for the $GATEWAYMAC string of zeroes below.
#! /bin/bash
GATEWAYIP=`system_profiler SPNetworkDataType | grep -m1 IPv4\.Router | awk -F'[=;]' '{print $2}'`

if [ ! -z "$GATEWAYIP" ]; then
  GATEWAYMAC=`arp $GATEWAYIP | head -n 1 | awk '{print $4}'`
fi

if [ ! -z "$GATEWAYMAC" ] && [ $GATEWAYMAC == "00:00:00:00:00:00" ]; then
  # Trusted network. Disable firewall.
  /usr/libexec/ApplicationFirewall/socketfilterfw --setglobalstate off
else
  # Not on a trusted network. Enable firewall.
  /usr/libexec/ApplicationFirewall/socketfilterfw --setglobalstate on --setblockall on
fi
Make it executable
Run this from the terminal:
chmod +x /var/root/networkchanged
sudo chown root:wheel /var/root/networkchanged
You will be asked for your admin password to make the ownership change for the script.
Try it
Run this from the terminal:
sudo /var/root/networkchanged
You’ll probably see the following output:
Firewall already disabled.
Now disconnect from your home network (unplug your network cable and/or turn off your Mac’s wifi) and run the script again. You should see:
Firewall is enabled. (State = 1) Firewall is set to block all non-essential incoming connections
Nice. You can also open System Preferences > Security & Privacy > Firewall and confirm that the little yellow light is on. Note that the state of this light only refreshes when you quit and relaunch System Preferences.
Note that as of macOS Sonoma, you’ll need to completely quit the System Settings app and re-open it to see the change to the Firewall On/Off state reflected.
Make it run automatically whenever the network changes
As root, create a file called /Library/LaunchDaemons/com.scripts.NetworkChanged.plist with the following contents. Substitute the full path to your networkchanged script.
<?xml version="1.0" encoding="UTF-8"?>
<!DOCTYPE plist PUBLIC "-//Apple Computer//DTD PLIST 1.0//EN" \ "http://www.apple.com/DTDs/PropertyList-1.0.dtd">
<plist version="1.0">
  <dict>
    <key>Label</key>
    <string>com.scripts.NetworkChanged</string>
    <key>LowPriorityIO</key>
    <true/>
    <key>Program</key>
    <string>/var/root/networkchanged</string>
    <key>WatchPaths</key>
    <array>
      <string>/private/var/run/resolv.conf</string>
    </array>
    <key>RunAtLoad</key>
    <true/>
  </dict>
</plist>
Make sure it’s owned by root:
sudo chown root:wheel /Library/LaunchDaemons/com.scripts.NetworkChanged.plist
Load it:
sudo launchctl load /Library/LaunchDaemons/com.scripts.NetworkChanged.plist
And you’re all set.
Test it
Take your computer off and bring it back onto your network and confirm that the firewall starts and stops correctly. Remember that you have to quit and re-launch System Settings to see the effect of your script on the indicator light.
